I’m a proud mother of a 18 months old boy named Dante. I wanted to save all his photos in a place different from my smartphone but to have access to them whenever I’m home. So I thought it would be a great opportunity to use my Raspberry 4 which is laying around with no use.
Here I’ll show you how to install Plex Media Server on your Pi and to install vsftpd to transfer files from your computer to your Pi via FTP. I’m currently using the Raspberry Pi 4 Model B with Debian GNU/Linux 11 (bullseye) OS. To transfer files to your Pi you also have to install FileZilla on your computer. I’m using Linux Debian-11 OS on my laptop as well.
If you are using an Debian distribution, just type the following command in the command line to confirm your current version.
lsb_release -a
First of all you have to install Plex Media Server in your Rasp. Plex is a digital media player and streaming service that allows you to access music, pictures and videos stored on a device with any other device. Access https://www.plex.tv/ to know more about it.
You can type the following commands to install Plex. The first and the second commands are necessary to make sure that our Pi is up to date. The third command enables apt package manger to retrieve packages over HTTPS protocol used by Plex repository.
The fourth command downloads and saves the key in our keyrings directory. This way we can ensure that the files we are about to download are from the Plex repository and signed by the key. The tee command creates a file named plex-archive-keyring.gpg, skipping the standard output in the terminal.
The 5th command adds the plex repository to the sources list by adding the file plexmediaserver.list to the folder /etc/apt/sources.list.d . This file contains the web repository address and the address of the plex gpg key saved in the previous step.
To finish up, before we finally install plexmediaserver (7th command), we have to refresh the package list with apt-get update command because we added a new repository to our sources.
sudo apt-get update
sudo apt-get full-upgrade
sudo apt-get install apt-transport-https
curl https://downloads.plex.tv/plex-keys/PlexSign.key | gpg --dearmor | sudo tee /usr/share/keyrings/plex-archive-keyring.gpg >/dev/null
echo deb [signed-by=/usr/share/keyrings/plex-archive-keyring.gpg] htps://downloads.plex.tv/repo/deb public main | sudo tee /etc/apt/sources.list.d/plexmediaserver.list
sudo apt-get update
sudo apt install plexmediaserver
You don’t have to connect a screen every time you want to use Plex on your Rasp. Just set Chromium to startup where you left (or to open a specific page) and than create a file called chromium.desktop with an specification to open up Chromium when you log in. It’s important to set on your Pi to “Auto login” (You can do that also with Raspberry Pi Configuration Preference, shown bellow).
Chromium Settings Screenshot
Save the file chromium.desktop in ~/.config/autostart/chromium.desktop with the following content:
Now we have to be able to save files in our Rasp with practicality. We just have to set up FTP (File Transfer Protocol) on Raspberry Pi for easy transferring of files over a network. First of all we make sure that SSH is enabled by using Raspberry Pi Configuration as shown bellow.
Raspberry Pi Menu Screenshot
Raspberry Pi Configuration Screenshot
Now we’re going to install a FTP server software called vsftpd on our Raspberry Pi. The first command just do that. The second command opens the vsftpd.conf configuration file to modify some settings.
Add or enable those settings bellow. The first and the second settings allow a single user with a local shell account to connect with FTP. The third setting enables the user to to upload files. The fourth setting change the mask to 022. The 5th setting prevents the FTP-connected user from accessing any file outside the directory tree. The last settings insert the username in our local_root directory path so our configuration will work for this user and any additional future users.
To finish the installation we create the files directory at /home/<user>/FTP. In my case the user is “michelle”. By using the -p argument mkdir creates the entire path tree. The second command removes the write permission from FTP directory to ensure no one can add files in to the FTP directory. Again I used “michelle” as user. Finally we need to restart the vsftpd.
mkdir -p /home/<user>/FTP/files
chmod a-w /home/<user>/FTP
sudo service vsftpd restart
Now we have to install FileZilla on the computer with this command.
sudo apt install filezilla
To find out the current IP address of your Raspberry Pi just type the following command line at your Rasp.
hostname -I
Back to the computer I set my Raspberry Pi IP to 192.168.1.152. I just type that in “Host”, michelle as my “Username”, my password, 21 in “Port” and click on “Quickconnect”.
FileZilla Screenshot
Now I can transfer photos of my baby boy from other devices to my Pi and than access it with my smartphone through Plex App whenever I want.
Plex Screenshot
To have more memory space the next step would be to set up my Pi as a NAS so I could transfer files to an attached storage. But that’s a story for another day. I hope you learned something new! Thanks for reading 😉
I’ve started to learn JavaScript and my first self-assignment task was to program a resistor color code calculator, wich I always wanted to code. You can check it out here! I also strongly recommend the JavaScript course that I’m taking. It’s inexpensive and you can learn very fast. I’m taking a course with Jonas Schmedtmann for the second time. It’s worthy taking a look here.
No more runaround. If you are a beginner in electronics or if you are a little rusty this post is for you! Here I’ll explain how the resistor color code works so you can know the resistance value just by seeing the colored strips printed on an axial lead resistor. If you don’t want to memorize the code you can just use my 4-band or 5-band resistor type calculator to find out the resistance value. You’re welcome!!
As said in PRACTICAL ELECTRONICS FOR INVENTORS, “Axial lead resistors, such as carbon composition, carbon film and metal film, use color bands to indicate resistance values. The most common labeling scheme uses four bands: the first band represents the first digit, the second band the second digit, the third band the multiplier (as an exponent of 10), and the fourth band the tolerance (if there is no fourth band, the tolerance is 20%).” . The table 1 shows the meaning of each band relating to its position.
4-band
5-band
1st band
1st significant digit
1st significant digit
2nd band
2nd significant digit
2nd significant digit
3rd band
multiplier
3rd significant digit
4th band
tolerance
multiplier
5th band
tolerance
Table 1 – Meaning of resistor bands.
The table 2 indicates the meaning of each color in regard to digit, multiplier and tolerance.
Band Color
Digit
Multiplier
Tolerance
Black
0
x100
Brown
1
x101
± 1%
Red
2
x102
± 2%
Orange
3
x103
Yellow
4
x104
Green
5
x105
± 0.5%
Blue
6
x106
± 0.25%
Violet
7
x107
± 0.1%
Gray
8
x108
± 0.05%
White
9
x109
Gold
x10-1
± 5%
Silver
x10-2
± 10%
Table 2 – Resistor Color Code
For example, we can check the resistance value of the first resistor at the picture above. The first band is brown with value of 1, the second band is black with value of 0, the third band is red with a 100 as multiplier and the fourth band is gold with tolerance of ± 5%. So the resistance is equal to 10 x 100 ± 5% = 1 KΩ ± 5%. In other words, the value is between 950 Ω – 1.05 KΩ. The second example is with the second resistor at the picture above. It’s a 5-band resistor with an extra digit normally used for greater accuracy. The first band is brown with value of 1, the second band is black with value of 0, the third band is also black with value of 0, the fourth band is red with a 100 as multiplier and the fifth band is brown with tolerance of ± 1%. So the resistance is equal to 100 x 100 ± 1% = 10 KΩ ± 1%. In other words, the value is between 9.9 KΩ – 10.1 KΩ.
Note that, in reality, the beige-colored body of a resistor is often an indication that its tolerance is 5%, while a blue-colored body often indicates a tolerance of 1% or 2%. There is also a 6-band resistor that includes a temperature coefficient band but I haven’t implemented it. Just remember to read the resistor from left side to right. Usually the gold or silver bands (for tolerance) are present on the right side.
That is it for today. I hope you enjoyed and learned something new! See you around!! 😄
I’ve started to learn Python and during this process I’ve found the turtle module, that turned out to be a funny way to practice my recent acquired abilities to write flow control, function declaration, working with random library and so on.
I’ve enjoyed it so much that I’ve decide to create a little animation and share this with the world! I definitely indicate the Turtle module for Python students, specially for kids.
So, what exactly is the Turtle module? It’s a popular way for introducing programming to kids. You can control a robotic turtle starting at (0, 0) in the x-y plane. This way you can draw primitive and complex geometric forms to create animations and games. You can check out the Turtle documentation here.
My animation is a project for beginners in Python. It shows some experiments with the turtle module, like drawing some alphabet letters, changing a turtle to a GIF image and drawing a bunch of circles. It also uses the random library to change colors and circle positions randomly.
Check out also a YouTube video with the animation here!
Below you’ll find a piece of code showing the function created to draw circles with random location, radius and color. You can download the complete project in my GitHub repository here.
Recently I have shown how to launch MagicMirror from RetroPie. You can check it out here! I also have shown how to switch back to RetroPie from MagicMirror using USB joystick buttons. Because I wanted to turn off the LEDs from the buttons while using MagicMirror I needed to disable power to the USB ports. I could do that by disconnecting one push button from the joystick hardware driver and connecting directly to a GPIO pin from Raspberry Pi. When pressed this button quits MagicMirror application, ends LXDE desktop, enables the power to the USB ports and goes back to RetroPie.
Before all that, If you want to install RetroPie in your Raspberry Pi just follow this link. You can also install MagicMirror by following the installation manual.
First you have to create a bash script called push_button.sh, to verify if the button was pressed, and save it in /home/pi/Documents. At the code, first the pin 11 (GPIO 17) is configured as input. After that there is an infinity loop where it is checked if the button was pressed. If the button was pressed at least 1 second, the loop is broken, the power to the USB ports is restored, the LXDE desktop ends and the RetroPie is launched again.
#!/bin/bash

# Set the pin for input
gpio -1 mode 11 in

while true; do
        # Set the variable through command substitution
        b=$(gpio -1 read 11)
        if (( b == 1 )); then
                sleep 1
                # Set the variable through command substitution
                b=$(gpio -1 read 11)
                if (( b == 1 )); then
                        break
                fi
        fi
done

echo '1-1' | sudo tee /sys/bus/usb/drivers/usb/bind
killall xinit
Note that I have used WiringPi library to read an input pin from Raspberry Pi. But there is no more official development of this repository. So you ask me why did I use it? Just because four years ago I bought a €50 book of Raspberry Pi and, finally when I used the book for the first time, I saw that this library was recommended there. So I had to justify my investment, but you can choose other way to manipulate GPIO pins.
To install WiringPi just type the following code at command line. The gpio command will be installed at /usr/local/bin.
The gpio readall command shows the 40-pin GPIO header with description of the pins. You can see bellow the header of my Raspberry Pi 3 Model B that I’m using as hardware for my Arcade.
Check it out again how to launch MagicMirror automatically from RetroPie here. Just remember to write mirror.desktop at /home/pi/.config/autostart (to run at every boot) and to write mirror.sh at home/pi/Documents (it’s called by mirror.desktop and it calls MagicMirror). Now we just have to modify mirror.sh to disable power to the USB ports before calling MagicMirror as shown bellow.
#!/bin/bash

echo 1-1 | sudo tee /sys/bus/usb/drivers/usb/unbind
cd /home/pi/MagicMirror
DISPLAY=:0 npm start
Now it’s missing the part where the push_button.sh script is called. Save the code bellow as push_button.desktop. This file is going call the bash script push_button.sh saved in /home/pi/Documents.
Don’t worry! We are almost finishing. The Pi screen will eventually go into sleep mode and we want to prevent that now that the USB joystick is disable. To do that type the following code.
$ sudo nano ~/.config/lxsession/LXDE-pi/autostart
And save autostart file as bellow.
@xset s 0 0
@xset s noblank
@xset s noexpose
@xset dpms 0 0 0
Finally our journey has come to an end!! You can use push buttons connected to GPIO pins together with USB joystick buttons to implement a variety of tasks. Sky’s the limit!
I hope you enjoyed and learned something new! See you around!! 🙂
Recently I have shown how to launch MagicMirror from RetroPie. You can check it out here! Now I want to show the opposite: How to access RetroPie from MagicMirror (running on LXDE desktop) using USB joystick buttons (by replacing mouse and keyboard). It’s possible to quit MagicMirror and to end LXDE desktop and go back to RetroPie by creating custom keyboard shortcuts and mapping them to the joystick buttons.
Before that, If you want to install RetroPie in your Raspberry Pi just follow this link. You can also install MagicMirror by following the installation manual.
You have to modify lxde-pi-rc.xml, a file that holds shortcuts settings, saved in /etc/xdg/openbox/. I recommend to create a folder called openbox at /home/pi/.config/ and save a copy there. This way the configuration file will run locally instead of globally and you can modify it completely. You can go back to the original configuration by deleting the local file so the untouched global file can be used.
$ cd /home/pi/.config
$ mkdir openbox
$ cd openbox
$ cp /etc/xdg/openbox/lxde-pi-rc.xml
$ nano lxde-pi-rc.xml
Now you can edit the file. First you search for keybindings for running applications (you can get there by typing CTRL+W and writing “Keybindings”), then you can add code for other shortcuts. At the example I added a shortcut for CTRL+A (key=”C-a”), to execute the mirror.sh script that starts MagicMirror, and for CTRL+C (key=”C-c”), to end LXDE desktop and go back to RetroPie. It’s good to remember that these shortcuts only work on the LXDE desktop. If you are logging into the command prompt via SSH, for example, it will not work.
You can write mirror.sh code saved in /home/pi/Documents as described bellow.
#!/bin/bash

cd /home/pi/MagicMirror
DISPLAY=:0 npm start
Don’t forget to make mirror.sh executable by tipping the following code at command line.
$ sudo chmod +x /home/pi/Documents/mirror.sh
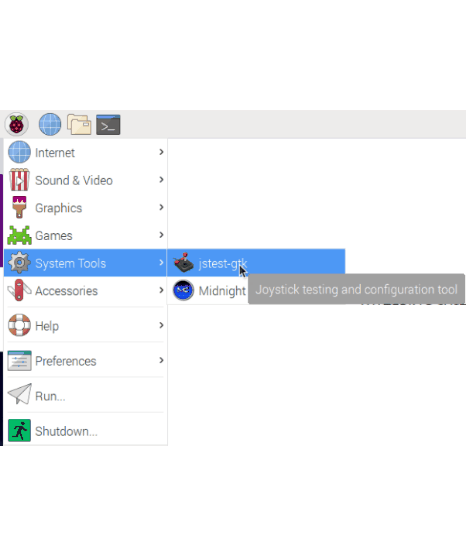
To use your USB joystick as a keyboard you have to install the joystick input driver and the joystick configuration package. To test and calibrate the gamepad you can run jstest-gtk.
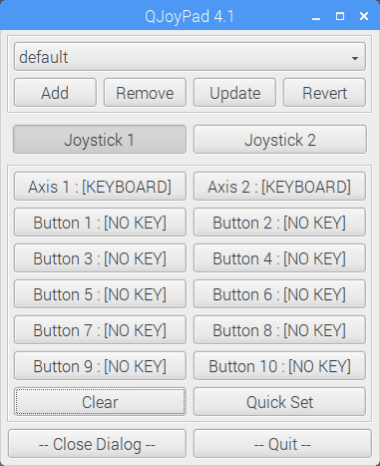
The next step is to install QJoyPad. This way you can map some keys of the keyboard to your joystick buttons.
$ sudo apt-get install qjoypad
Note that I saved my settings as Arcade and I mapped the keys CTRL, Q, A and C. So now I can use my joystick to start MagicMirror (CTRL+A), to quit an application (CTRL+Q) and to quit the desktop and go back to RetroPie (CTRL+C). You can map other keys to run any application that you want.
Now you have to guarantee that QJoyPad is executed automatically as soon as the desktop starts. First you have to create a file to call this application. Let’s call the file qpad.desktop and save it in /home/pi/.config/autostart to run at every boot. You’ll have to create the autostart folder if it doesn’t exist.
$ cd /home/pi/.config/
$ mkdir autostart
$ cd autostart
$ nano qpad.desktop
Save the code bellow as qpad.desktop. Note the last code line that you have to pass your saved settings as parameter (Arcade).
Finally you can go back to RetroPie from MagicMirror!! If you want to do the same thing but using instead a push button connected to a GPIO pin from the Raspberry Pi, click here! This way you can also disable the USB ports to save energy.
I hope you enjoyed and learned something new! See you around!! 🙂
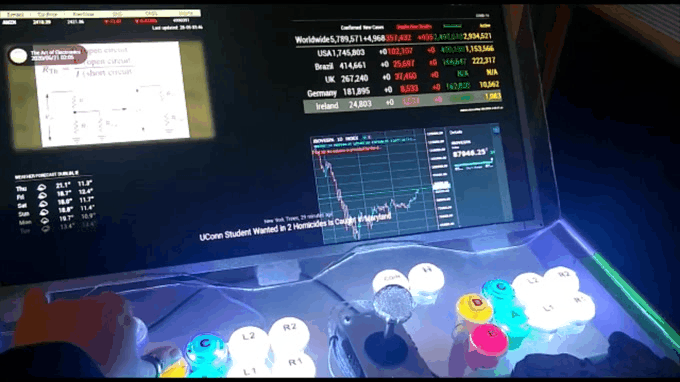
I’m new to Raspberry Pi and I have recently built an Arcade with it, using an old monitor and 2 Player Joystick Buttons. Now I’m trying to explore the full potential of the Raspberry Pi and I wanted to launch the MagicMirror application from RetroPie.
My version of RetroPie is comit f90600 (Date: Jul 30 2019) and I can see that by typing this at the command line:
$ cd ~/RetroPie-Setup
$ git show
If you want to install RetroPie in your Raspberry Pi just follow this link. You can also install MagicMirror by following the installation manual.
Getting back to the subject, first you have to install PIXEL desktop environment (to run MagicMirror from there) by accessing RetroPie menu -> RetroPie SETUP -> Configuration / tools -> raspbiantools – Raspbian related tools -> Install Pixel desktop environment. After that you can access desktop from the ports menu.
To start MagicMirror automatically first you have to create a file to call a bash script that executes MagicMirror (you must have installed it before). Let’s call the file mirror.desktop and save it in /home/pi/.config/autostart to run at every boot. You’ll have to create the autostart folder if it doesn’t exist.
$ cd /home/pi/.config/
$ mkdir autostart
$ cd autostart
$ nano mirror.desktop
Save the code bellow as mirror.desktop. This file is going call the bash script mirror.sh saved in /home/pi/Documents.
#!/bin/bash

cd /home/pi/MagicMirror
DISPLAY=:0 npm start
Don’t forget to make mirror.sh executable by tipping the following code at command line.
$ sudo chmod +x /home/pi/Documents/mirror.sh
Yes!!! Finally the MagicMirror starts automatically from the RetroPie!!!! But… What about going back to RetroPie from MagicMirror, without a mouse or a keyboard, just using the joystick controller. I’ve tried two different approaches to end the user session and you can check it out by clicking the following links: using USB joystick buttons and using a push button connected to GPIO.
I hope you enjoyed and learned something new! See you around!! 🙂
HackerRank is a technology hiring platform that enables tech recruiters to evaluate the job candidate objectively. I wanted to brush up on my C programming language knowledge and start do learn C++ when I ran into HackerRank.
This platform is fantastic! You can solve several problems to achieve a high level of programming language proficiency in C, C++, Java, Python,
, etc. There are also tutorials like “30 Days of Code” and “10 Days of Statistics”. I particularly liked the “Problem Solving” section, it sharpens your ability to think outside the box. It is noteworthy that every proposed problem has a “Discussions” section where you can talk about the solution with other people.
They have a star reward system, that motivates you to keep programming, and a coin called “Hackos”, which also stimulates you to keep the attendance and helps you with problems solution. In addition, there is the “Leaderboard” organized by subjects. In this way, the platform works like a game and you don’t feel you are studying.
They have so many features that I haven’t had the chance to look into everything. For example, they also helps you to develop specialized skills like Artificial Intelligence, SQL and Databases and Regex.
You can check out my profile and the way I solve the problems at this link! If you want to point out where I can improve the code, please let me know!!
I hope you have a lot of fun with HackerRank!! Enjoy it!


Recent Comments